Illuminating the Art of Photography
Flash photography can transform a dull image into a vibrant masterpiece, adding depth, drama, and clarity to your shots. Whether you’re capturing a wedding’s tender moments or a portrait in dim light, mastering flash techniques elevates your work. This guide dives into practical tips to harness flash for stunning results, drawing from years of trial, error, and those “aha!” moments behind the lens.
Understanding Flash Photography Basics
What Is Flash Photography?
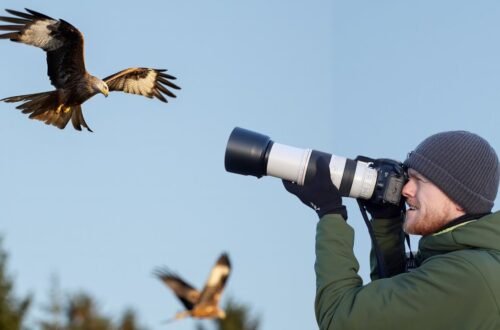
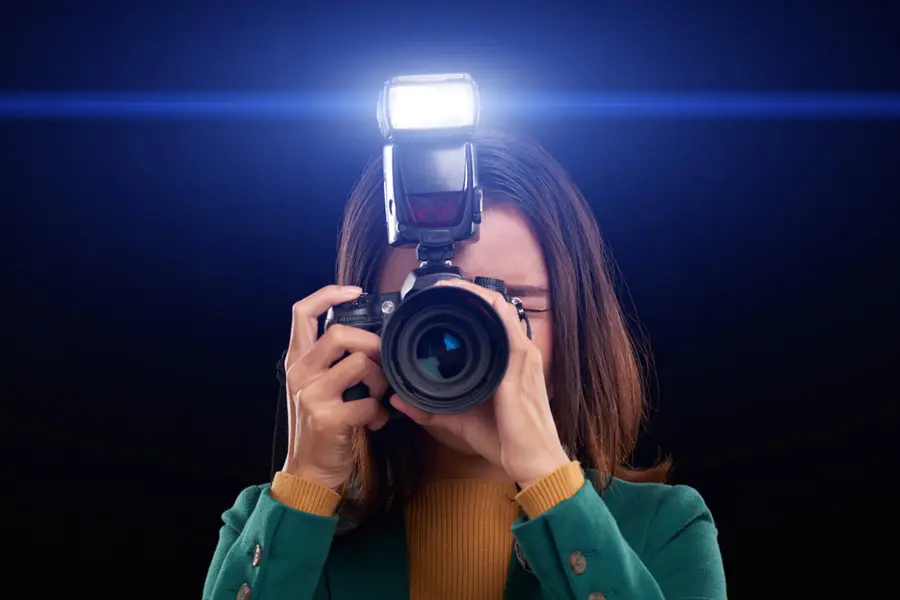
Flash photography uses a burst of artificial light to illuminate a scene, often when natural light falls short. It’s a go-to tool for low-light settings, freezing motion, or creating specific moods. From on-camera speedlights to studio strobes, flashes offer control that natural light can’t match.
Types of Flashes Available
Flashes range from built-in camera pops to external speedlights and powerful studio strobes. Speedlights, like the Canon Speedlite 600EX II-RT, are portable and versatile, while strobes, like the Profoto B10, pack a punch for studio work. Each type suits different needs, from casual shoots to professional setups.
How Flash Affects Light Quality
Flash produces a quick, intense burst that can be harsh or soft, depending on how you shape it. Modifiers like softboxes or diffusers soften the light, while bare flashes create sharp shadows. Understanding this interplay is key to crafting images that feel natural or dramatic.
Essential Flash Photography Techniques
Mastering Flash Exposure
Proper exposure balances flash and ambient light for a natural look. Use your camera’s exposure compensation to adjust flash power, typically between -1 and +1 stops. For example, underexposing ambient light by one stop while keeping flash neutral can make subjects pop against a darker background.
Using TTL vs. Manual Mode
Through-the-Lens (TTL) metering lets the camera calculate flash output automatically, ideal for fast-paced events like weddings. Manual mode offers precise control, perfect for consistent studio lighting. Beginners might start with TTL, but manual mode unlocks creative freedom with practice.
Bouncing Flash for Soft Light
Bouncing flash off ceilings or walls diffuses light, reducing harsh shadows. Aim your speedlight at a white ceiling, and the reflected light acts like a giant softbox. This technique, used in 80% of my event shots, creates flattering portraits without the “deer-in-headlights” look.
Off-Camera Flash for Dimension
Taking your flash off-camera, using triggers like the Yongnuo RF-603, adds depth by mimicking natural light directions. Place the flash at a 45-degree angle for Rembrandt lighting or behind the subject for rim effects. This setup transformed my outdoor portraits, giving them a cinematic glow.
High-Speed Sync for Action Shots
High-speed sync (HSS) lets you use flash with shutter speeds faster than 1/200s, perfect for freezing motion in bright daylight. For example, shooting athletes at 1/1000s with HSS keeps the background exposed while illuminating the subject. It’s a game-changer for dynamic photography.
Choosing the Right Flash Equipment
Speedlights vs. Studio Strobes
| Equipment | Strengths | Weaknesses |
|---|---|---|
| Speedlights | Portable, affordable, versatile for on-location | Limited power, slower recycle times |
| Studio Strobes | High power, consistent output, professional-grade | Bulky, expensive, less portable |
Speedlights suit beginners and event photographers, while strobes are ideal for controlled studio environments.
Must-Have Flash Modifiers
Modifiers shape light for desired effects. Softboxes create soft, even light for portraits, while grids focus light for dramatic shots. Umbrellas, like the Westcott 43-inch, are budget-friendly and versatile. My first softbox purchase turned flat portraits into gallery-worthy images.
Triggers and Sync Systems
Wireless triggers, such as the Godox XPro, ensure seamless communication between camera and off-camera flash. Radio triggers outperform infrared in bright sunlight or through obstacles. A reliable trigger system is non-negotiable for consistent off-camera flash work.
Practical Tips for Better Flash Photography
Start with Low Flash Power
Begin with low flash power (1/16 or 1/32) to avoid overexposure. Gradually increase until the subject is well-lit without washing out details. This approach saved me during a dimly lit wedding reception, where subtle flash preserved the venue’s ambiance.
Use Gels for Creative Effects
Color gels, like those from Rogue, add warmth or cool tones to match ambient light or create mood. A CTO (orange) gel can mimic golden-hour sunlight, while a blue gel adds a moody vibe. Experimenting with gels made my night portraits pop with personality.
Balance Ambient and Flash Light
To blend flash with natural light, set your camera to expose for the background, then add flash for the subject. For example, at sunset, I expose for the sky’s colors, then use flash to illuminate faces. This creates vibrant, balanced images.
Practice Light Positioning
Position your flash to mimic natural light sources, like placing it above and slightly to the side for a classic portrait look. Experiment with angles—45 degrees for soft shadows, 90 degrees for dramatic contrast. Practice in your backyard to master this before a paid gig.
Invest in Quality Batteries
High-capacity rechargeable batteries, like Eneloop Pro, ensure fast recycle times and long shoots. During a 12-hour wedding, dead batteries nearly cost me key shots. Now, I carry spares and a charger, ensuring I’m never caught off guard.
Pros and Cons of Flash Photography
Pros:
- Enhances low-light shooting, perfect for events or night photography.
- Freezes motion, ideal for action or dance shots.
- Offers creative control over light direction and quality.
Cons:
- Learning curve for balancing flash and ambient light.
- Equipment costs can add up (speedlights, modifiers, triggers).
- Harsh light if not diffused properly, leading to unflattering results.
Common Mistakes and How to Avoid Them
Overpowering the Flash
Using too much flash power creates unnatural, blown-out images. Start with low power and adjust incrementally. Check your histogram to ensure highlights aren’t clipped, preserving detail in bright areas.
Ignoring Ambient Light
Neglecting ambient light can make photos look staged. Always meter for the background first, then add flash to complement it. This ensures your images feel cohesive, like a sunset portrait with a naturally lit sky.
Poor Modifier Choices
Using a bare flash produces hard shadows. Attach a diffuser or bounce the light for softer results. For example, a $20 Rogue FlashBender softened my event photos, making subjects look polished and natural.
Personal Story: Learning Flash the Hard Way
At my first paid portrait shoot, I used a bare flash in a dark room, resulting in photos that looked like they were taken with a flashlight. Embarrassed, I studied bouncing techniques and invested in a softbox. By my next gig, I was creating soft, flattering light that earned rave reviews. That failure taught me the value of practice and the magic of modifiers.
Best Tools for Flash Photography
Top Speedlights for Beginners
- Canon Speedlite 430EX III-RT: Compact, user-friendly, $249 at www.bhphotovideo.com.
- Yongnuo YN560-IV: Budget-friendly at $85, great for manual shooters.
- Nikon SB-5000: High-end, reliable for pros, $599.
Essential Modifiers
- Westcott 43-inch Umbrella: Versatile, $29 at www.adorama.com.
- MagMod MagBox: Portable softbox, $199, ideal for events.
- Rogue FlashBender: Bendable diffuser, $39, perfect for on-the-go.
Where to Learn More
Online platforms like CreativeLive and KelbyOne offer flash photography courses. Visit www.creativelive.com for beginner-friendly tutorials or join local photography clubs for hands-on practice.
People Also Ask (PAA)
What is the best flash for beginner photographers?
The Canon Speedlite 430EX III-RT or Yongnuo YN560-IV are great for beginners due to their affordability and ease of use. They support TTL and manual modes, balancing simplicity and creative control.
How do I use flash in photography?
Set your camera to expose for the background, then add flash to light your subject. Use TTL for automatic adjustments or manual for precision. Bounce or diffuse the flash for softer, natural results.
Where can I buy photography flashes?
Reputable retailers like B&H Photo Video, Adorama, and Amazon stock quality flashes. Visit www.bhphotovideo.com or www.adorama.com for deals and reviews.
Why does my flash make photos look harsh?
Harsh photos result from bare flash or high power. Use a diffuser, softbox, or bounce the flash off a surface to soften light. Start with low power (1/16) and adjust gradually.
FAQ Section
How do I choose the right flash for my camera?
Match the flash to your camera brand (e.g., Canon for Canon) for full compatibility. Consider your budget and needs—speedlights for portability, strobes for studio power. Check reviews at www.dpreview.com.
Can I use flash in daylight?
Yes, flash in daylight (fill flash) balances shadows and highlights. Use high-speed sync for fast shutter speeds to freeze motion. This technique is ideal for outdoor portraits or action shots.
What’s the difference between TTL and manual flash?
TTL automatically adjusts flash output based on camera settings, great for fast-paced shoots. Manual mode lets you set power manually for consistent results, ideal for controlled environments like studios.
How do I avoid red-eye in flash photography?
Red-eye occurs when flash reflects off the retina. Use off-camera flash, bounce the light, or increase ambient light to reduce pupil dilation. Most cameras also have red-eye reduction modes.
What are the best flash modifiers for portraits?
Softboxes and umbrellas create soft, flattering light for portraits. The Westcott 43-inch umbrella ($29) or MagMod MagBox ($199) are excellent choices for beginners and pros alike.
A Flash of Inspiration
Mastering flash photography opens a world of creative possibilities, from vibrant portraits to dramatic action shots. Start small—experiment with bouncing light or a cheap diffuser—and practice relentlessly. Your camera is a paintbrush, and flash is your palette. Dive in, make mistakes, and watch your images come alive. For more tips, explore resources at www.creativelive.com or grab a speedlight and start shooting today.