Why Bird Photography Captivates Beginners
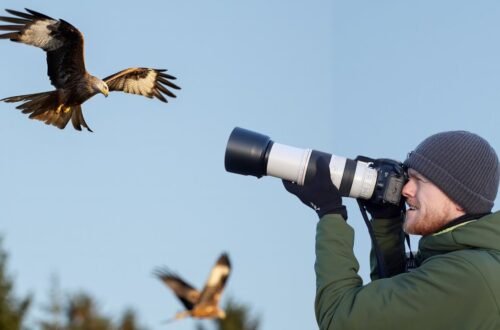
Bird photography blends the thrill of nature with the art of capturing fleeting moments, making it an exciting hobby for beginners. Whether it’s a vibrant cardinal flashing through your backyard or a majestic eagle soaring above, photographing birds offers a unique way to connect with the natural world. My first attempt at bird photography—a blurry shot of a sparrow—taught me patience and sparked a lifelong passion. This guide will help you avoid my early mistakes and start snapping stunning bird photos right away.
Understanding Bird Photography Basics
What Is Bird Photography?
Bird photography involves capturing images of birds in their natural habitats, showcasing their behavior, colors, and environments. It requires a mix of technical camera skills, knowledge of bird behavior, and a knack for timing. As a beginner, I was overwhelmed by camera settings, but learning the basics made all the difference.
Why Start with Bird Photography?
Birds are accessible subjects, found in backyards, parks, and forests, making them perfect for beginners. The challenge of capturing their quick movements sharpens your photography skills while deepening your appreciation for nature. My first clear shot of a blue jay felt like a small victory, proving that anyone can start this journey.
Essential Gear for Bird Photography
Cameras for Beginners
You don’t need a top-tier camera to start bird photography, but a decent DSLR or mirrorless camera offers flexibility. Entry-level options like the Canon EOS Rebel T7 or Nikon Z50 provide great image quality at affordable prices. When I started, my old Canon with a kit lens worked fine for backyard birds.
Lenses: The Key to Success
A telephoto lens with at least 300mm focal length is ideal for capturing birds from a distance without disturbing them. Budget-friendly options include the Sigma 150-600mm or Tamron 100-400mm. I learned the hard way that zooming in too close with a short lens scares birds away.
Tripods and Accessories
A sturdy tripod stabilizes your shots, especially in low light, while a monopod offers mobility for tracking moving birds. A camera bag and lens cleaning kit are also must-haves. My first tripod was a cheap one that wobbled, so invest in quality to avoid frustration.
Gear Comparison Table
| Gear | Budget Option | Mid-Range Option | Key Benefit |
|---|---|---|---|
| Camera | Canon EOS Rebel T7 ($450) | Nikon Z50 ($900) | Image quality, ease of use |
| Lens | Canon EF 75-300mm ($200) | Sigma 150-600mm ($1,200) | Reach for distant birds |
| Tripod | Amazon Basics 60-Inch ($30) | Manfrotto Element MII ($150) | Stability for long shoots |
Camera Settings for Stunning Bird Photos
Shutter Speed: Freezing Motion
Birds move fast, so a shutter speed of 1/1000s or faster is crucial to freeze their motion. For perched birds, 1/500s can work. My early photos were blurry until I prioritized high shutter speeds, transforming my results.
Aperture: Balancing Light and Depth
A wide aperture (f/5.6 or lower) blurs the background, making your bird pop. However, in bright light, a narrower aperture (f/8) ensures sharpness. Experimenting with aperture helped me capture a sharp hummingbird against a dreamy backdrop.
ISO: Adapting to Light
Use a low ISO (100-400) in bright conditions for crisp images, and increase to 800-1600 in low light, but beware of noise. I once pushed ISO too high and ended up with grainy shots—lesson learned.
Autofocus: Tracking Birds
Set your camera to continuous autofocus (AI Servo for Canon, AF-C for Nikon) to track moving birds. Single-point focus works for perched birds. Mastering autofocus was a game-changer for my in-flight shots.
Finding and Approaching Birds
Best Places to Photograph Birds
Local parks, nature reserves, and wetlands are ideal spots. Websites like eBird (ebird.org) help locate bird hotspots near you. My first great shots came from a nearby lake, where I spotted herons and ducks galore.
Understanding Bird Behavior
Learn your target species’ habits—when they feed, rest, or migrate. Early mornings and late afternoons are prime times for activity. Watching a robin’s predictable hopping pattern helped me anticipate the perfect shot.
Ethical Photography Practices
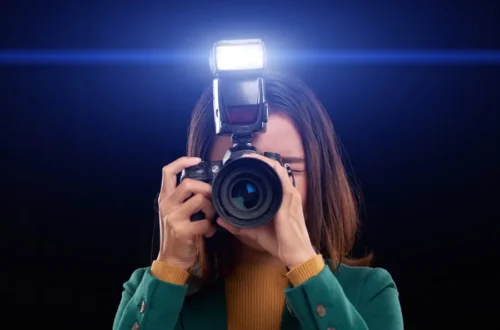
Keep a respectful distance (at least 20 feet) to avoid stressing birds. Avoid flash photography and never disturb nests. I once got too close to a nest and felt awful seeing the parents flee—patience is key.
Composition Tips for Eye-Catching Photos
Rule of Thirds
Place the bird off-center using the rule of thirds to create a balanced, dynamic image. This technique made my photos more engaging than centered, static shots.
Focus on the Eyes
A sharp eye draws viewers in. Use single-point autofocus to lock onto the bird’s eye. My early photos lacked this focus, making them feel lifeless.
Capture the Environment
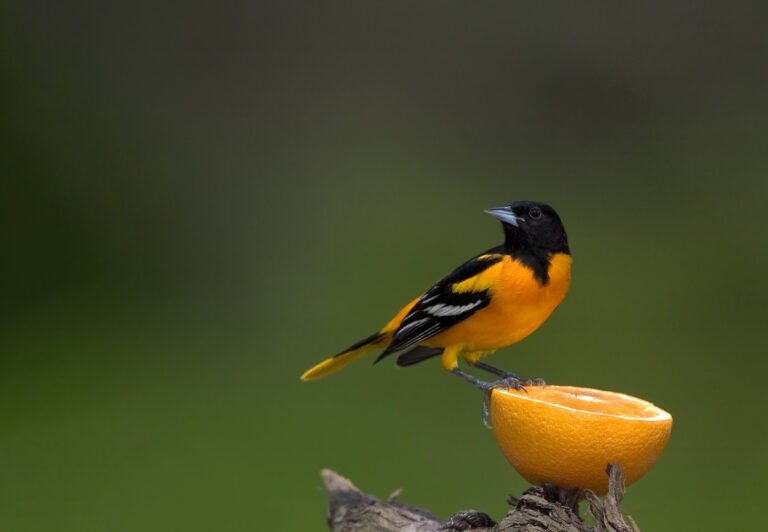
Include natural elements like branches or water to tell a story about the bird’s habitat. A shot of a sparrow on a blooming branch became one of my favorites for its context.
Pros and Cons of Bird Photography
Pros:
- Accessible subjects in most environments.
- Improves patience and observation skills.
- Affordable gear options for beginners.
Cons:
- Requires patience for unpredictable subjects.
- High-quality lenses can be expensive.
- Weather and lighting can be challenging.
Post-Processing for Polished Results
Editing Software Options
Free tools like GIMP or paid options like Adobe Lightroom make post-processing accessible. Lightroom’s intuitive sliders helped me enhance colors without overdoing it.
Basic Editing Tips
Adjust exposure, contrast, and sharpness to enhance your images. Crop to improve composition, but don’t overedit—natural looks best. My first edits were too heavy-handed, making birds look cartoonish.
Best Editing Tools Table
| Tool | Cost | Best For | Where to Get |
|---|---|---|---|
| Adobe Lightroom | $10/month | Color correction, organization | adobe.com |
| GIMP | Free | Basic edits, budget-friendly | gimp.org |
| Photoshop | $20/month | Advanced retouching | adobe.com |
Overcoming Common Beginner Challenges
Dealing with Fast-Moving Birds
Practice panning with your camera to track birds in flight. Start with slower birds like gulls before tackling speedy hawks. My first attempts at tracking were dizzying, but practice paid off.
Shooting in Low Light
Use a higher ISO and wider aperture in low light, and stabilize with a tripod. Early morning shoots taught me to embrace soft light for moody, beautiful shots.
Avoiding Blurry Photos
Ensure a fast shutter speed and steady hand or tripod. I lost countless shots to blur before mastering these basics, but persistence made all the difference.
People Also Ask (PAA)
What is the best camera for bird photography beginners?
Entry-level DSLRs like the Canon EOS Rebel T7 or mirrorless cameras like the Nikon Z50 are great for beginners due to their affordability and quality. Pair with a telephoto lens (300mm or more) for best results.
What lens should I use for bird photography?
A telephoto lens with 300-600mm focal length, like the Sigma 150-600mm, is ideal for capturing distant birds. Budget options like the Canon EF 75-300mm work for beginners but may limit reach.
Where can I find birds to photograph?
Local parks, nature reserves, and wetlands are excellent spots. Use eBird (ebird.org) to find birding hotspots near you, and visit during early mornings or late afternoons for peak activity.
How do I get sharp bird photos?
Use a fast shutter speed (1/1000s or higher), continuous autofocus, and focus on the bird’s eye. A tripod or monopod helps stabilize shots, especially in low light.
Best Tools and Resources for Beginners
Cameras and Lenses
- Canon EOS Rebel T7: Affordable DSLR for beginners ($450, canon.com).
- Sigma 150-600mm: Versatile telephoto lens ($1,200, sigmaphoto.com).
- Nikon Z50: Compact mirrorless option ($900, nikonusa.com).
Learning Resources
- Cornell Lab of Ornithology: Free bird identification courses (allaboutbirds.org).
- Photography Life: Beginner-friendly tutorials (photographylife.com).
- YouTube Channels: Creators like Mark Smith offer practical bird photography tips.
Where to Buy Gear
- B&H Photo Video: Wide selection of cameras and lenses (bhphotovideo.com).
- Adorama: Competitive prices and bundles (adorama.com).
- Amazon: Budget-friendly tripods and accessories (amazon.com).
FAQ Section
Do I need an expensive camera for bird photography?
No, entry-level DSLRs or mirrorless cameras like the Canon EOS Rebel T7 are sufficient for beginners. Focus on a good telephoto lens for better results.
What’s the best time to photograph birds?
Early mornings and late afternoons offer soft light and peak bird activity. Avoid midday when harsh light creates unflattering shadows.
How do I avoid scaring birds away?
Keep a distance of at least 20 feet, move slowly, and avoid sudden noises or flash. Wearing neutral colors helps you blend into the environment.
Can I use a smartphone for bird photography?
Smartphones with telephoto attachments can work for casual shots, but they lack the zoom and clarity of DSLRs or mirrorless cameras for serious photography.
How do I edit bird photos effectively?
Use software like Lightroom to adjust exposure, contrast, and sharpness. Crop for better composition, but keep edits subtle to maintain a natural look.
Conclusion: Your Journey to Stunning Bird Photos
Bird photography is a rewarding adventure that combines technical skill with a love for nature. From mastering camera settings to understanding bird behavior, every step brings you closer to capturing breathtaking images. My own journey—from blurry sparrows to sharp eagles—shows that with patience and practice, anyone can excel. Grab your camera, head to a local park, and start snapping—your perfect shot is waiting!