Introduction to Creative Photography
Ever grabbed your camera, itching to capture something extraordinary, only to end up with shots that feel… meh? I’ve been there, staring at a sunset that looks magical in person but flat on my screen. Photography is an art, and with a few clever techniques, you can transform ordinary moments into stunning visuals. This guide shares 21 practical, creative tips to elevate your photography game today, whether you’re using a DSLR, mirrorless, or just your smartphone. Let’s dive in and spark some inspiration!
Why Creativity Matters in Photography
Creativity is the secret sauce that turns a snapshot into a story. It’s about seeing the world differently—finding beauty in a raindrop or drama in a shadow. These tips blend technical know-how with artistic flair, designed to help beginners and seasoned shooters alike. With 68% of Americans owning a camera-equipped smartphone, there’s never been a better time to get creative behind the lens.
The Power of Experimentation
Photography thrives on trial and error. Experimenting with angles, lighting, or settings can lead to unexpected masterpieces. Think of it like cooking—sometimes a dash of spice (or a quirky angle) makes all the difference. Don’t be afraid to break the rules and find your unique style.
Tools for Every Budget
You don’t need a $2,000 camera to create stunning images. From free editing apps to affordable lenses, today’s tools make creativity accessible. This article covers tips for all skill levels and budgets, ensuring everyone can join the fun.
21 Photography Tips and Tricks
1. Master the Rule of Thirds
The rule of thirds is your go-to for balanced, eye-catching compositions. Imagine your frame divided into a 3×3 grid and place key elements along the lines or at their intersections. This simple trick adds dynamism to landscapes, portraits, and even food shots. It’s like giving your photo a map to guide the viewer’s eye.
How to Apply It
Download a grid overlay for your camera or phone, or visualize it mentally. Position horizons on the upper or lower third, and place subjects off-center for a natural, engaging look. Practice with everyday scenes to make it second nature.
2. Play with Leading Lines
Leading lines—like roads, fences, or rivers—draw viewers into your photo, creating depth. I once shot a winding path through a forest, and the lines made the image feel like an invitation to explore. Use natural or man-made lines to guide attention to your subject.
Finding Lines in Everyday Life
Look for lines in architecture, nature, or even shadows. Train tracks, staircases, or tree branches work wonders. Experiment with angles to make lines converge toward your focal point for maximum impact.
3. Experiment with Light and Shadows
Light is photography’s heartbeat, and shadows add drama. Shoot during golden hour (just after sunrise or before sunset) for warm, soft light, or use harsh midday shadows for bold contrast. My best portrait came from catching a friend’s silhouette against a glowing sunset.
Golden Hour vs. Harsh Light
Golden hour offers flattering, diffused light, ideal for portraits and landscapes. Harsh light creates stark contrasts, perfect for dramatic black-and-white shots. Check weather apps like AccuWeather for sunrise/sunset times.
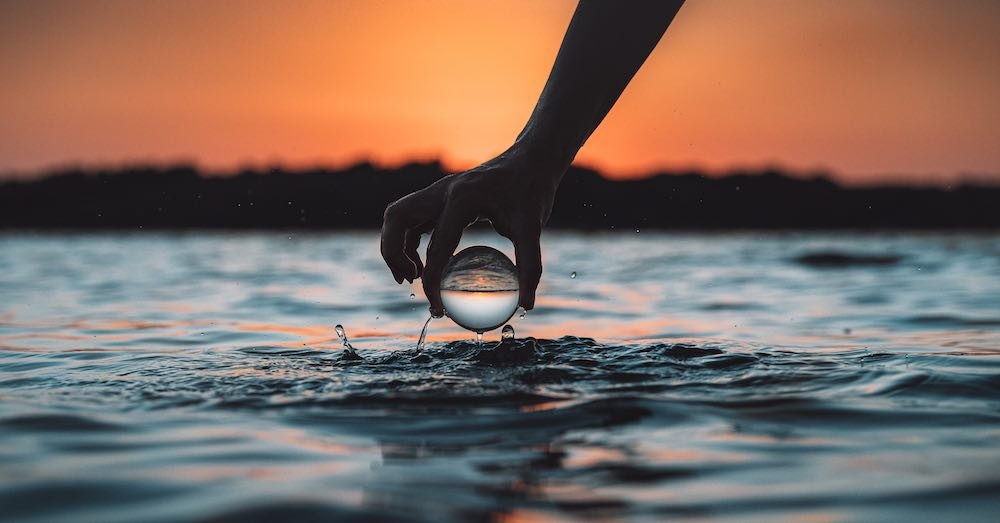
4. Use Reflections for Unique Shots
Reflections in puddles, mirrors, or glass can double your creative impact. A rainy day in my neighborhood turned a mundane street into a mirrored masterpiece with just a low-angle shot. Reflections add symmetry and intrigue, making ordinary scenes extraordinary.
Where to Find Reflections
Hunt for reflective surfaces like water, windows, or polished floors. Smartphones are great for low-angle puddle shots. Try flipping the image in editing apps like Snapseed for a surreal effect.
5. Try Long Exposure for Motion
Long exposure captures motion as a dreamy blur—think silky waterfalls or streaking car lights. Use a tripod and a slow shutter speed (1/2 second or longer) to create this effect. I once shot a bustling city street at night, and the light trails turned it into a sci-fi scene.
Tools for Long Exposure
Use a tripod (like the Joby GorillaPod) and a neutral density (ND) filter for daytime shots. Apps like Slow Shutter Cam for iPhone mimic long exposure without extra gear. Practice with moving water or traffic for stunning results.
6. Get Low or High for New Perspectives
Changing your angle can transform a shot. Crouch low to make a flower loom large or climb a hill for a sweeping landscape. I got my favorite pet photo by lying on the floor, capturing my cat’s curious eyes from below. New perspectives make familiar subjects feel fresh.
Practical Angle Tips
- Low Angles: Emphasize height or drama, great for kids or pets.
- High Angles: Show scale or patterns, perfect for food or crowds.
- Side Angles: Add intimacy to portraits or still life.
7. Use Negative Space for Impact
Negative space—empty areas around your subject—creates a minimalist, powerful composition. A lone tree against a vast sky can evoke solitude. I once shot a single coffee cup on a bare table, and the simplicity made it my most-liked Instagram post.
Balancing Negative Space
Place your subject off-center using the rule of thirds, leaving empty space to breathe. Use plain backgrounds like walls or skies. Edit with apps like Lightroom to enhance contrast and emphasize the emptiness.
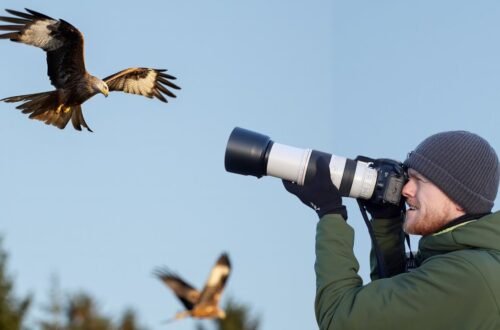
8. Capture Candid Moments
Posed shots are great, but candids capture raw emotion. At a family barbecue, I snapped my niece mid-laugh, and it’s still a cherished photo. Turn off your flash, stay unobtrusive, and shoot in burst mode to catch fleeting moments.
Tips for Candid Photography
Use a zoom lens or your phone’s telephoto mode to stay discreet. Anticipate moments—like a smile during a conversation—and shoot continuously. Apps like VSCO can enhance natural tones in post-processing.
9. Experiment with Macro Photography
Macro photography reveals tiny details, like dew on a leaf or texture on a butterfly’s wing. It’s like discovering a hidden world. My first macro shot of a flower petal felt like stepping into a sci-fi microcosm. Use a macro lens or your phone’s macro mode for close-ups.
Macro Gear on a Budget
- Clip-on Lenses: Apexel or Moment lenses for smartphones ($20–$100).
- DSLR Lenses: Canon EF-S 35mm or Nikon 40mm macro lenses ($200–$300).
- DIY: Reverse a standard lens or use extension tubes for close-ups.
10. Create Silhouettes for Drama
Silhouettes turn subjects into bold shapes against bright backgrounds, like a person against a sunset. I shot a friend on a beach at dusk, and the dark outline against the glowing sky was pure magic. Expose for the background to keep the subject dark.
Silhouette Setup
Shoot during golden hour with the sun behind your subject. Use manual mode to underexpose the subject or tap the bright background on your phone. Edit in Snapseed to boost contrast for a sharper silhouette.
11. Use Color Theory to Pop
Colors set the mood of your photos. Complementary colors (like blue and orange) create vibrant contrast, while analogous colors (like blue and green) feel harmonious. A blue dress against a golden field made one of my portraits unforgettable.
Color Tips
- Complementary: Pair opposites on the color wheel (red-green, blue-orange).
- Monochromatic: Use shades of one color for a cohesive look.
- Tools: Apps like Adobe Color help plan color schemes.
12. Try Black-and-White Photography
Black-and-white strips away distractions, emphasizing texture and contrast. A rainy street scene I shot in monochrome felt like a classic movie still. It’s perfect for moody portraits or gritty urban shots.
When to Go Monochrome
Use black-and-white for high-contrast scenes or to highlight textures like skin or architecture. Edit with Lightroom or Snapseed to adjust shadows and highlights. Experiment with filters to mimic film grain.
13. Shoot Through Objects
Shooting through objects—like windows, leaves, or fences—adds depth and intrigue. I once shot a portrait through a glass of water, creating a dreamy distortion. This technique frames your subject creatively and adds a storytelling element.
Objects to Try
- Glass: Creates distortion or soft focus.
- Leaves: Adds natural framing or bokeh.
- Fabric: Sheer materials for a diffused effect.
14. Use a Polarizing Filter
A polarizing filter cuts glare and boosts color saturation, making skies bluer and leaves greener. It’s like sunglasses for your camera. I used one for a lake shoot, and the water’s clarity was jaw-dropping.
Where to Get Filters
- Budget: Hoya or Tiffen polarizing filters ($20–$50).
- Premium: B+W or Nikon filters ($80–$150).
- Phone: Moment’s polarizing lens for smartphones.
15. Create Bokeh for Dreamy Backgrounds
Bokeh—those soft, blurry light circles—adds a magical touch to portraits and close-ups. Use a wide aperture (f/1.8 or f/2.8) and a distant background with lights. My holiday lights shot with bokeh became a family favorite.
Bokeh Hacks
Use a fast lens (50mm f/1.8 is affordable) or your phone’s portrait mode. Position your subject far from the background, ideally with fairy lights or foliage. Edit in Lightroom to enhance the blur.
16. Shoot in RAW for Editing Flexibility
RAW files capture more data than JPEGs, giving you control over exposure and colors in editing. My first RAW shoot saved an underexposed sunset shot that would’ve been lost otherwise. Most cameras and newer smartphones support RAW.
RAW Editing Tools
- Free: Snapseed or Darktable for beginners.
- Paid: Adobe Lightroom or Capture One ($10–$20/month).
- Storage Tip: RAW files are large, so invest in a 1TB external drive.
17. Use Everyday Objects as Props
Props like umbrellas, hats, or books add personality to your shots. I once used a vintage suitcase for a travel-themed portrait, and it told a story without words. Look around your home for items that spark creativity.
Prop Ideas
- Nature: Flowers or branches for organic vibes.
- Vintage: Old cameras or books for nostalgia.
- Colorful: Bright scarves or balloons for pops of color.
18. Experiment with Double Exposure
Double exposure blends two images, like a portrait over a landscape, for a surreal effect. My double exposure of a friend’s face over a cityscape felt like a dreamscape. Many cameras and apps like Photoshop Express support this.
How to Do It
Use your camera’s double exposure mode or layer images in Photoshop. Try combining a silhouette with a textured background like trees or clouds. Practice with simple subjects to master the blend.
19. Capture Motion with Panning
Panning involves moving your camera with a moving subject, like a cyclist, to blur the background while keeping the subject sharp. I panned a skateboarder, and the dynamic blur made it look like a sports ad. Use a shutter speed of 1/30 to 1/60 second.
Panning Tips
Practice smooth camera movement, following the subject’s motion. Use continuous autofocus and burst mode. Try it with cars, bikes, or even running pets for action-packed shots.
20. Use Apps for Creative Edits
Editing apps like Lightroom, Snapseed, or VSCO can enhance your photos with filters, color tweaks, or textures. I turned a dull beach photo into a vibrant masterpiece with a few taps in Snapseed. These tools are beginner-friendly and free or low-cost.
Top Editing Apps
- Snapseed: Free, with powerful tools like selective editing.
- VSCO: $20/year for premium filters and film-like presets.
- Lightroom Mobile: Free basic version, $10/month for full features.
21. Join a Photography Community
Photography is more fun with others. Joining a local club or online group like 500px or Flickr can inspire new ideas and provide feedback. I joined a local photo walk and learned framing tips that transformed my street shots.
Where to Connect
- Online: 500px, Flickr, or Instagram hashtags like #PhotoChallenge.
- Local: Meetup.com for photography clubs or workshops.
- Courses: Skillshare or Udemy for structured learning.
Comparing Photography Tools
| Tool | Best For | Price Range | Ease of Use |
|---|---|---|---|
| Smartphone | Casual, on-the-go shooting | $0 (if you own one) | Beginner-friendly |
| DSLR/Mirrorless | Professional, high-quality shots | $500–$2,000 | Moderate learning curve |
| Tripod (Joby) | Long exposure, stable shots | $20–$100 | Easy |
| Editing Apps | Post-processing, enhancements | Free–$20/month | Beginner-friendly |
Smartphone vs. Camera
- Smartphone: Portable, affordable, great for social media. Limited in low light or zoom.
- DSLR/Mirrorless: Superior image quality, versatile lenses. Heavier and pricier.
Pros and Cons of Creative Photography
| Aspect | Pros | Cons |
|---|---|---|
| Accessibility | Affordable tools like smartphones | Can require time to master techniques |
| Creativity | Endless possibilities for expression | Over-editing can ruin natural beauty |
| Learning Curve | Free resources online | Advanced gear can be expensive |
Personal Story: My Photography Journey
A few years ago, I picked up my dad’s old Canon, determined to capture more than blurry vacation pics. My first attempt at golden hour photography was a disaster—overexposed and shaky—but it sparked a passion. I started experimenting with reflections and bokeh, turning everyday moments like coffee runs or park walks into art. Joining a local photo club pushed me to try long exposure, and now I’m hooked on capturing light trails at night. Photography has taught me to see beauty everywhere, and I hope these tips inspire you to do the same.
People Also Ask (PAA) Section
How can I make my photos look professional?
Use the rule of thirds, shoot in RAW, and edit with apps like Lightroom or Snapseed. Good lighting, like golden hour, and clean compositions also elevate your shots. Practice consistently to refine your skills.
What are the best photography apps for beginners?
Snapseed (free) and VSCO ($20/year) are great for beginners, offering easy-to-use filters and tools. Lightroom Mobile ($10/month) is ideal for advanced editing. Download from the App Store or Google Play.
Where can I find affordable photography gear?
Check Amazon or B&H Photo for budget tripods, lenses, and filters. For smartphones, clip-on lenses from Apexel or Moment are affordable. Local camera shops or eBay offer used gear at lower prices.
How do I improve my photography composition?
Use the rule of thirds, leading lines, and negative space to create balanced, engaging shots. Experiment with angles and framing. Online resources like Digital Photography School offer free composition tips.
FAQ Section
What’s the easiest way to start creative photography?
Start with your smartphone, using the rule of thirds and natural light. Experiment with free apps like Snapseed for editing. Practice daily with simple subjects like flowers or streets.
Can I do professional photography with a smartphone?
Yes, modern smartphones like the iPhone 16 or Google Pixel 9 produce high-quality images. Use clip-on lenses or apps like Lightroom for professional results. Good composition is key.
Where can I learn photography for free?
Websites like Digital Photography School and YouTube channels like Peter McKinnon offer free tutorials. Join platforms like 500px for community feedback. Local libraries may have photography books.
How do I choose the right camera for creative photography?
For beginners, a smartphone or entry-level DSLR like the Canon EOS Rebel T7 ($400) is great. Mirrorless cameras like the Sony A6400 ($900) offer versatility. Check reviews on B&H Photo.
What’s the best time to shoot outdoor photos?
Golden hour (just after sunrise or before sunset) offers soft, warm light ideal for most shots. Check AccuWeather for exact times. Midday light works for dramatic, high-contrast images.
Transactional Content: Best Tools for Creative Photography
Cameras for Beginners
- Canon EOS Rebel T7: Affordable DSLR ($400) with great image quality.
- Sony A6400: Compact mirrorless ($900) for video and stills.
- Where to Buy: B&H Photo, Amazon, or Adorama for deals.
Accessories
- Joby GorillaPod: Flexible tripod ($20–$100) for unique angles.
- Hoya Polarizing Filter: Enhances colors ($20–$50).
- Moment Smartphone Lenses: Macro or wide-angle ($50–$150).
Learning Resources
- Skillshare: Online courses on composition and editing ($15/month).
- YouTube: Free tutorials from channels like Peter McKinnon or Mango Street.
- Books: “Understanding Exposure” by Bryan Peterson, available on Amazon.
Conclusion: Unleash Your Inner Artist
Photography is about capturing moments that matter, whether it’s a fleeting sunset or a loved one’s smile. These 21 tips—from mastering the rule of thirds to experimenting with bokeh—offer a roadmap to creativity, no matter your gear or experience. My own journey showed me that a little experimentation can turn ordinary scenes into extraordinary stories. Grab your camera or phone, try one of these techniques today, and share your shots on platforms like 500px or Instagram. Visit Digital Photography School for more inspiration, and let your creativity shine!